

Table of Contents
- Why Archery Form Matters: The Foundation of Accuracy
- Diagnosing Your Form Problems: A Self-Assessment Workflow
- Correcting Stance and Posture Errors
- Fixing Bow Grip and Bow-Arm Position
- Mastering Your Archery Anchor Point for Consistency
- Refining Your Archery Release Technique
- Using Archery Form Drills to Lock In Corrections
- Overcoming Target Panic in Archery and Mental Form Blocks
- Frequently Asked Questions
Last Updated: October 19, 2026
Why Archery Form Matters: The Foundation of Accuracy
Proper archery form is the difference between grouping arrows tight and watching them scatter all over the target. When your form is solid, your bow does what it's supposed to do.
Archers who struggle with consistency almost always have a form issue hiding somewhere. The good news: once you identify the problem, you can fix archery form with focused practice.
Why form matters so much:
- Consistency comes from repeating the exact same motion every shot
- Small form flaws create large arrow-impact variations downrange
- Correcting form early prevents bad habits from locking in
- Better form means better accuracy, which means more confidence
Think of archery form like a chain. If one link is weak, the whole thing breaks. Your stance, posture, grip, anchor point, and release all work together. Fix one piece without addressing the others, and you'll still struggle.
Diagnosing Your Form Problems: A Self-Assessment Workflow
Most archers know something is wrong but can't pinpoint what. You shoot, the arrow misses left, and you wonder: Is it my stance? My grip? My release? The fix depends on knowing the real cause.
Here's how to find it.
Step 1: Video Your Shot
Record yourself shooting from the side, at a 90-degree angle to your body. This is the single most useful diagnostic tool you have. Video reveals what you can't feel.
What to look for when you watch:
- Does your bow arm drift forward or backward during the draw?
- Does your elbow rotate up or drop down?
- Does your body lean into or away from the target?
- Does your head move toward the bow string?
- Does your release hand punch forward, or does it move straight back?
Record at least five shots. Watch each one twice. The first time, just observe. The second time, focus on one body part at a time.
Step 2: Check Arrow Impact Patterns
How your arrows hit the target tells you what your form is doing wrong. Different errors create predictable patterns.
Common impact patterns and what they mean:
Arrow Impact Pattern |
Likely Form Issue |
What to Check First |
|---|---|---|
Grouping left consistently |
Bow arm position or grip torque |
Elbow rotation, grip pressure |
Grouping right consistently |
String clearance or draw-hand position |
Anchor point, finger placement |
Arrows high |
Release timing or bow angle |
Follow-through, bow tilt |
Arrows low |
Bow angle or posture |
Leaning forward, dropped shoulder |
Wide group (no pattern) |
Inconsistent anchor or release |
Anchor point consistency, follow-through |
Shoot a group of five arrows at 20 yards. Look at where they cluster, not where one arrow landed. A tight group that's off-center is a form issue. A scattered group means inconsistency.
Step 3: Identify Which Phase Failed
Archery form breaks into distinct phases. Knowing which phase is broken narrows your fix.
The four phases of a shot:
- Setup, Stance, posture, and how you hold the bow before you draw
- Draw, How you pull the string back and build tension
- Anchor, Where your hand stops and how stable it is
- Release, How your fingers leave the string and how your body follows through
If your arrows group left, the problem is usually setup or draw. If they're scattered, it's usually anchor or release. If they're consistently high or low, it's often posture or bow angle.
Watch your video again. Pause it at each phase. Does something look wrong? That's where to focus and fix archery form.
Correcting Stance and Posture Errors
Your stance is your foundation. A weak stance makes everything else harder. Your feet, hips, and shoulders all need to work together.
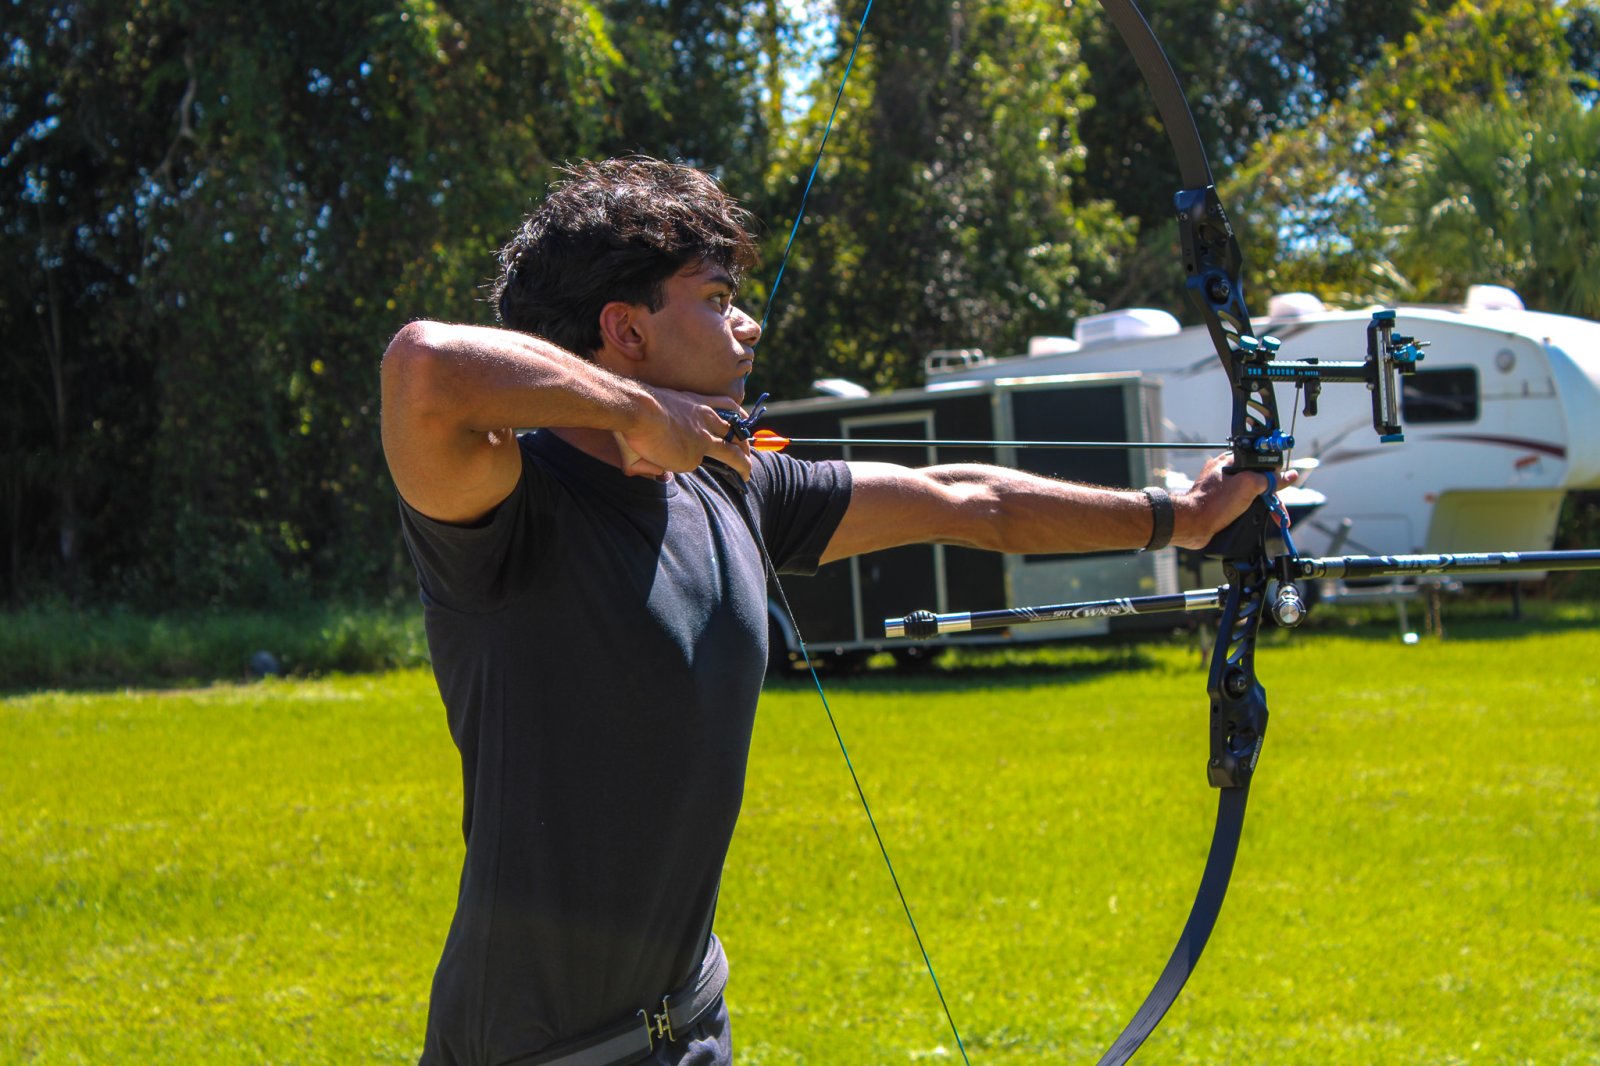
The correct stance:
- Stand with feet shoulder-width apart, perpendicular to the target
- Keep your weight balanced on the balls of your feet
- Point your toes straight ahead or slightly outward
- Keep your hips open and relaxed, not twisted
- Stand tall through your torso without arching your back
A common mistake is standing too narrow. Narrow feet feel unstable and force your body to compensate.
Another mistake is leaning. When you're nervous or trying hard, you lean forward into the shot. Your video will show this instantly.
Posture fixes:
- Keep your shoulders relaxed and level
- Don't hunch forward or slouch backward
- Imagine a string pulling you up from the top of your head
- Engage your core lightly to keep your spine straight
- Avoid locking your knees; keep them slightly soft
Many archers lock their knees without realizing it. Locked knees make you rigid and force tension into your upper body.
Practice your stance without a bow. Stand in position, hold it for 30 seconds, then check yourself in a mirror. Does it feel natural?
Fixing Bow Grip and Bow-Arm Position
Your bow grip creates bow torque if it's too tight.
The correct grip:
- Hold the bow with a relaxed hand, not a death grip
- Let the bow rest in the webbing between your thumb and index finger
- Keep your wrist straight, not bent forward or back
- Imagine holding a baby bird: firm enough to control, gentle enough not to hurt
Pressure is the enemy. Many archers grip too hard because they're nervous. The bow won't fall. Let it rest in your hand.
Your bow arm also needs attention. During the draw, your elbow should rotate outward, not stay tight to your body.
Bow-arm position at full draw:
- Your elbow should be level with your shoulder or slightly below
- Your elbow should rotate outward, away from your body
- Your arm should form a straight line from shoulder to hand
- Your hand should be relaxed, not tense
A dropped elbow is one of the most common bow-arm errors. When your elbow drops, your string path changes and your arrow flies unpredictably. Watch your video.
String clearance matters too. Your string needs a clear path to your arm.
Mastering Your Archery Anchor Point for Consistency
Your anchor point is where your draw hand stops. It's the same spot every single shot. Without a consistent anchor point, you can't be consistent.
The standard anchor point:
- Your draw-hand index finger should touch the corner of your mouth
- Your draw hand should be relaxed against your face
- Your string should touch your nose and chin
- Your head should be still and upright
Some archers use a jaw anchor instead. Your draw hand sits under your jaw, with your thumb against your neck.
Consistency beats perfection. If your anchor is slightly off but you do it the same way every shot, your arrows will group. If your anchor moves around, your arrows scatter.
Practice anchor point:
- Draw your bow 10 times without shooting
- Stop at full draw and check your anchor
- Is your finger in the same spot each time?
- Is your string in the same position on your face?
- Adjust until it feels locked in
Many archers find their anchor by feel. Close your eyes, draw, and notice where your hand lands naturally. That's often your best anchor point.
Refining Your Archery Release Technique
Your release is the moment the string leaves your fingers. A bad release ruins a perfect draw.
The correct release:
- Keep your draw hand relaxed throughout the draw
- Don't punch or jab the string forward
- Let your fingers open smoothly as you apply back tension
- Your hand should move straight back, not forward
- Your elbow should stay up and back after release
A common mistake is punching. Your fingers tense up and jab the string away. This creates inconsistency because the punch varies slightly each shot.
Instead, focus on back tension. Pull with your back muscles, not your fingers. Your fingers are just hooks holding the string.
Back-tension release practice:
- Draw your bow and hold at anchor
- Tighten your back muscles while keeping your fingers relaxed
- Feel your shoulder blade squeeze toward your spine
- Your fingers will open naturally
- The string releases without you thinking about it
Your follow-through matters too. After release, keep your bow arm steady. Don't collapse your elbow or drop your shoulder. Hold your position for a second after the arrow leaves.
Using Archery Form Drills to Lock In Corrections
Drills build muscle memory. When you drill the same motion hundreds of times, it becomes automatic.
Essential archery form drills:
- Draw holds, Draw and hold at anchor for 10 seconds, five times. Focus on a specific form element each round.
- Blank-bale shooting, Shoot at a close distance (10 yards) without a target, focusing only on form, not results.
- Mirror shooting, Practice your draw and anchor in front of a mirror to see what you're actually doing.
- Clicker drills, Use a clicker to build consistent draw length. The clicker tool for archery form training provides audible feedback when you reach full draw.
The Shot Trainer Pro-Lite is an excellent tool for form practice.

Drill one element at a time. If you're working on your anchor point, do draw holds. If you're working on your release, do blank-bale shooting. Don't try to fix everything at once.
Track your progress. Shoot groups of five arrows, record them, and compare week to week. You should see tighter groups as your form improves.
Overcoming Target Panic in Archery and Mental Form Blocks
Target panic is when you freeze or rush your shot at the moment of truth. Your form falls apart because your mind does.
Target panic often shows up as:
- Punching your release early
- Jerking your bow arm
- Rushing through your draw
- Freezing at anchor and not being able to release
The fix isn't physical. It's mental. You need to trust your form and let your shot happen naturally.
Rebuilding confidence after target panic:
- Shoot at very close distances (10-15 yards) where you can't miss
- Focus on executing your form, not the result
- Take deep breaths before each shot
- Practice your shot sequence without a target
- Build success with easy shots first
Many archers benefit from working with a certified instructor who can watch your form and spot the mental blocks.
The book "Tuning for Performance" by Jake Kaminski covers mental aspects of archery alongside technical form details. It's a solid resource for understanding how your mind affects your shot.

Remember: target panic is fixable. Thousands of archers have worked through it. You will too.
Frequently Asked Questions
How can I tell if my archery form is wrong?
Video your shots from the side and behind to spot deviations in stance, posture, bow-arm position, and anchor point. Compare your arrow impact pattern to your aim: arrows grouping left or right suggest grip torque or elbow rotation errors; high or low impacts point to posture or anchor inconsistency. Inconsistent group size itself signals form breakdown under fatigue or pressure. If your arrows are grouping but missing your aim, the problem is likely aiming or sight setup, not form.
What is the correct archery anchor point, and why does it matter?
Your anchor point is where your draw hand contacts your face at full draw—typically the corner of your mouth or jaw. Consistency here is critical because even small shifts change your sight picture and arrow impact. A locked anchor ensures your eye, string, and arrow align the same way every shot. Use a clicker or practice with tools like the Shot Trainer Pro, which helps with consistent anchor point, to build muscle memory.
How do I stop target panic in archery from affecting my shot?
Target panic often stems from conscious aiming or anxiety at full draw. Practice back-tension release drills where you focus on pulling through the shot rather than punching or aiming. Shoot at close distances first to rebuild confidence, then gradually extend range. Use the Shot Trainer Pro to rehearse smooth, automatic releases, as it helps with back-tension release and followthrough. Mental rehearsal—visualizing your perfect shot before drawing—also helps break the panic cycle.
Can I fix archery form mistakes I've already picked up, or is it too late?
Form mistakes are never permanent. Bad habits take time to break, but consistent, focused practice rewires your muscle memory. Start with drills that isolate the problem area—for example, anchor-point drills or grip-pressure work—then integrate corrections into full shots. Most archers see noticeable improvement within 2-4 weeks of deliberate practice. Working with a certified instructor accelerates the process by catching errors you might miss on your own.
Improving your archery form takes time, but the results are worth it. Tighter groups, more confidence, and a deeper love of the sport come from solid fundamentals. If you're serious about fixing your form, work with a certified coach who can watch your shot, identify the real issues, and guide you through the corrections. Central Florida Archery's experienced staff can help you build form that lasts. Plan a visit and let's get your shot dialed in.